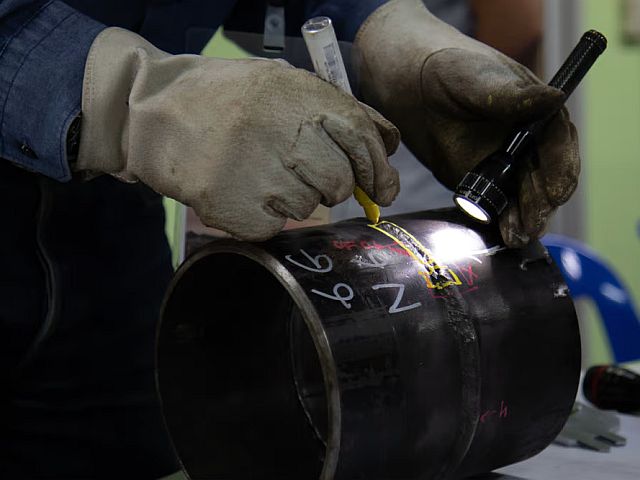
NDT Technique
Radiographic Testing (RT)
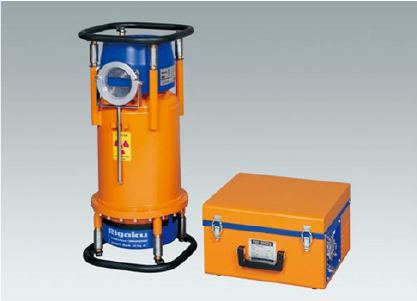
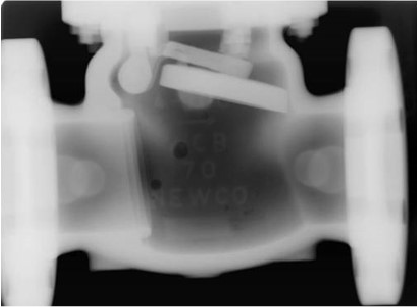
One of our most used techniques, radiography can be used to discover volumetric and some planar discontinuities by using short-wavelength electromagnetic radiation to penetrate the specimen which is projected onto a viewing medium.
- Access to all sides of the component is required when carrying out radiographic testing.
- We use both radioisotopes and electronic irradiating apparatus.
Common applications:
Welded pipe joints
Checking profile of internal corrosion
Castings
NDT Technique
NDT Technique
Ultrasonic Testing (UT)
Ultrasonic Testing (UT)
Another of our primary techniques for the detection of volumetric and planar discontinuities, UT is primary used for inspection of newly fabricated welds, corrosion monitoring and thickness measurement.
High frequency sound waves are generated by the UT set and transducer which penetrate the component and reflect of an interface such as the internal wall of the component or a discontinuity such as laminations. The reflected signal is then transmitted back to the UT set display for interpretation by the technician.
UT is an ideal substitute for radiography when only one side of the component is accessible in which RT is not possible.
Common applications:
Zero-degree inspection – Used for thickness measurements corrosion profiling and mapping
Angle beam inspection – New and in-service weld inspection
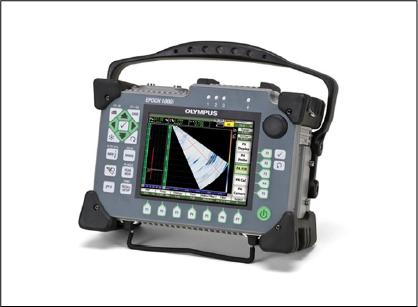
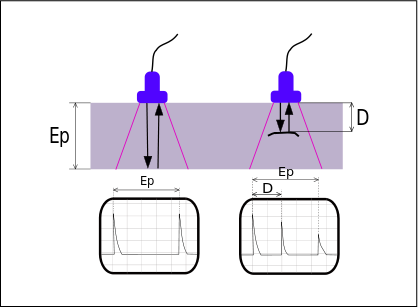
Above is a representation of the UT flaw detector display showing no defect on the left and with a defect present on the right.
NDT Technique
Dye Penetrant Inspection (DPI/PT)
Generally carried out on non-ferrous materials such as stainless steel and aluminium but can also be used on ferrous materials if required.
Dye is applied to the component which soaks into any opening/discontinuity open to the surface. After a set amount of time the dye is washed off and a developer is applied which draws the dye out of these openings revealing discontinuities to be interpreted by the technician.
We employ both fluorescent and visible PT techniques.
Common applications:
Stainless steel welds
Stress corrosion cracking identification on in service components
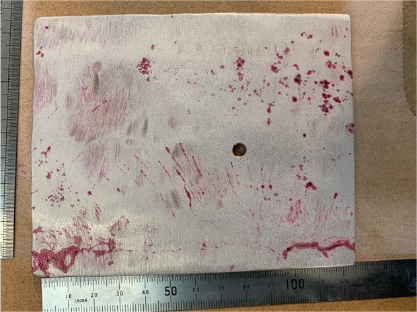
Sample taken from pressure vessel with stress corrosion cracking evident
NDT Technique
Magnetic Particle testing (MT/MPI)
Magnetic particle inspection is used to detect surface and, in some cases sub-surface discontinuities in ferrous materials by inducing a magnetic field into the component with the aid of contrast spray paint and ferrous iron particles. These particles can either be dry or suspended in liquid.
This method can be used in most situations if the surface is free from coatings or other contaminants and is often used to complement radiography and ultrasonic inspections as these methods are less likely to detect small surface discontinuities.
We utilise both contrast and fluorescent techniques.
Common applications:
Weld testing of any geometry and joint configuration
Bolts, shafts, pins, threaded sections
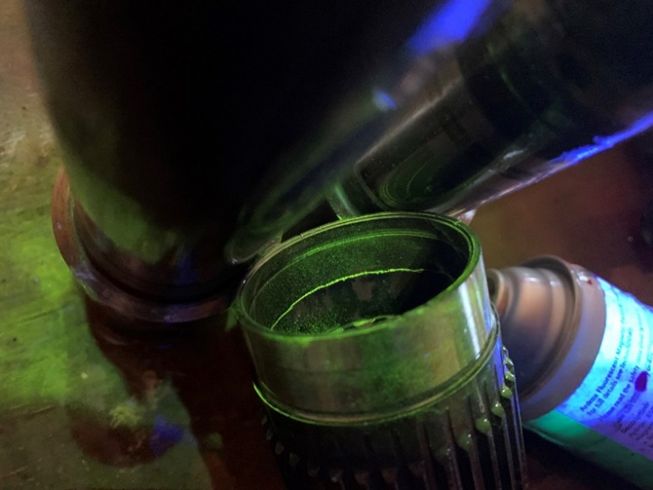
Through-wall crack found in stub axle from elevated work platform
NDT Technique
Hardness Testing
Testing the hardness of various steels can determine if the correct heat input control in welding has been used or if heat treatment has adversely affected the material properties.
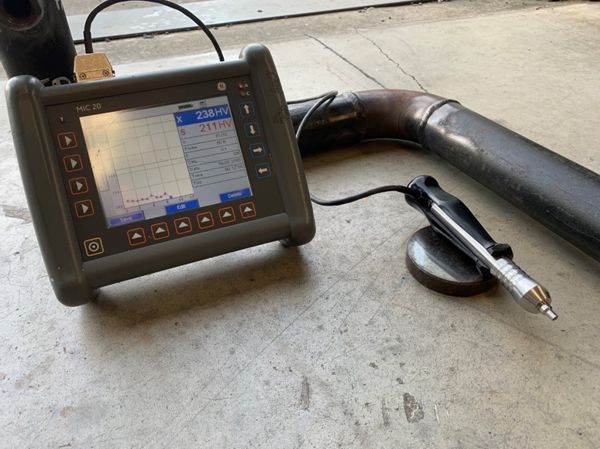
We use a portable hardness tester using the UCI (Ultrasonic Contact Impedance) method and can provide a result in Vickers, Brinell or Rockwell.
NDT Technique
Radiographic Testing (RT)
One of our most used techniques, radiography can be used to discover volumetric and some planar discontinuities by using short-wavelength electromagnetic radiation to penetrate the specimen which is projected onto a viewing medium.
- Access to all sides of the component is required when carrying out radiographic testing.
- We use both radioisotopes and electronic irradiating apparatus.
Common applications:
- Welded pipe joints
- Checking profile of internal corrosion
Castings


NDT Technique
NDT Technique
Ultrasonic Testing (UT)
Ultrasonic Testing (UT)
Another of our primary techniques for the detection of volumetric and planar discontinuities, UT is primary used for inspection of newly fabricated welds, corrosion monitoring and thickness measurement.
High frequency sound waves are generated by the UT set and transducer which penetrate the component and reflect of an interface such as the internal wall of the component or a discontinuity such as laminations. The reflected signal is then transmitted back to the UT set display for interpretation by the technician.
UT is an ideal substitute for radiography when only one side of the component is accessible in which RT is not possible.
NDT Technique
Ultrasonic Testing (UT)
Common applications:
Zero-degree inspection – Used for thickness measurements corrosion profiling and mapping
Angle beam inspection – New and in-service weld inspection

NDT Technique
Dye Penetrant Inspection (DPI/PT)
Generally carried out on non-ferrous materials such as stainless steel and aluminium but can also be used on ferrous materials if required.
Dye is applied to the component which soaks into any opening/discontinuity open to the surface. After a set amount of time the dye is washed off and a developer is applied which draws the dye out of these openings revealing discontinuities to be interpreted by the technician.
We employ both fluorescent and visible PT techniques.
Common applications:
Stainless steel welds
Stress corrosion cracking identification on in service components

Sample taken from vessel with SCC evident (Stress corrosion cracking) evident.
NDT Technique
Magnetic Particle testing (MT/MPI)
Magnetic particle inspection is used to detect surface and, in some cases sub-surface discontinuities in ferrous materials by inducing a magnetic field into the component with the aid of contrast spray paint and ferrous iron particles. These particles can either be dry or suspended in liquid.
This method can be used in most situations if the surface is free from coatings or other contaminants and is often used to complement radiography and ultrasonic inspections as these methods are less likely to detect small surface discontinuities.
We utilise both contrast and fluorescent techniques.
Common applications:
Weld testing of any geometry and joint configuration
Bolts, shafts, pins, threaded sections

Through-wall crack found in stub axle from elevated work platform
NDT Technique
Hardness Testing
Testing the hardness of various steels can determine if the correct heat input control in welding has been used or if heat treatment has adversely affected the material properties.
We use a portable hardness tester using the UCI (Ultrasonic Contact Impedance) method and can provide a result in Vickers, Brinell or Rockwell.

NDT Technique
Weld Inspection
Our certified welding inspectors (CWI), have extensive industry experience and can assist with preparation and issuing of Procedure Qualification Records (PQR), and Welding Procedure Specifications (WPS).
Services Include:
Visual inspection
PQR writing
WPS writing
Welding consultation
