NDT Technique
Phased Array Ultrasonic Testing (PAUT)
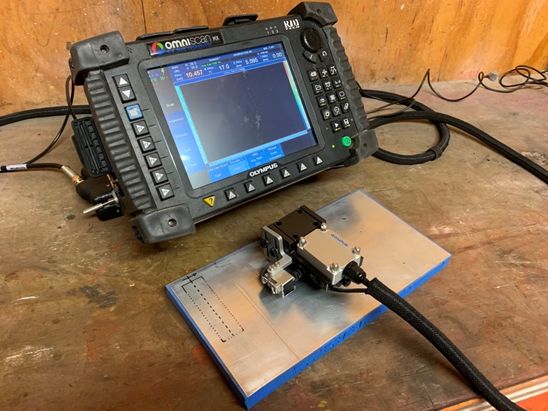
Phased Array follows the same concept of conventional ultrasonic testing but can utilise transducers with multiple elements which allows for advanced scanning setups where the ultrasonic beam can be steered at multiple angles simultaneously.
Phased Array Ultrasonics can provide comprehensive results in relation to orientation and depth within a specimen and with the use of encoding apparatus attached to the transducer. Areas of interest can be mapped, and inspections can be repeated on a regular basis for the purposes of monitoring potential discontinuity growth.
This method is primarily used for weld and corrosion inspection, but other applications are possible with the help of specialist equipment.
HydroFORM – A buggy utilising a water column and phased array probe. Works well on rough surfaces which is an advantage over hard wedge scanning methods.
Dual Matrix – For coarse grained austenitic stainless steels and Inconel alloy materials and welds.
Common applications:
Tank floors/walls or vessels to check for corrosion or lamellar discontinuities.
Weld scanning using phased array is much more efficient than using conventional probes as a range of angles can be captured in a single scan as opposed to changing probes for each scan with conventional UT.
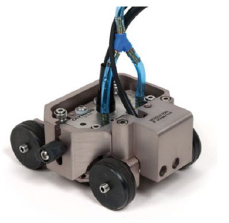
HydroFORM buggy
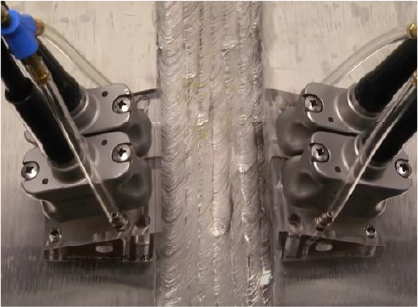
Dual matrix setup on stainless steel weld
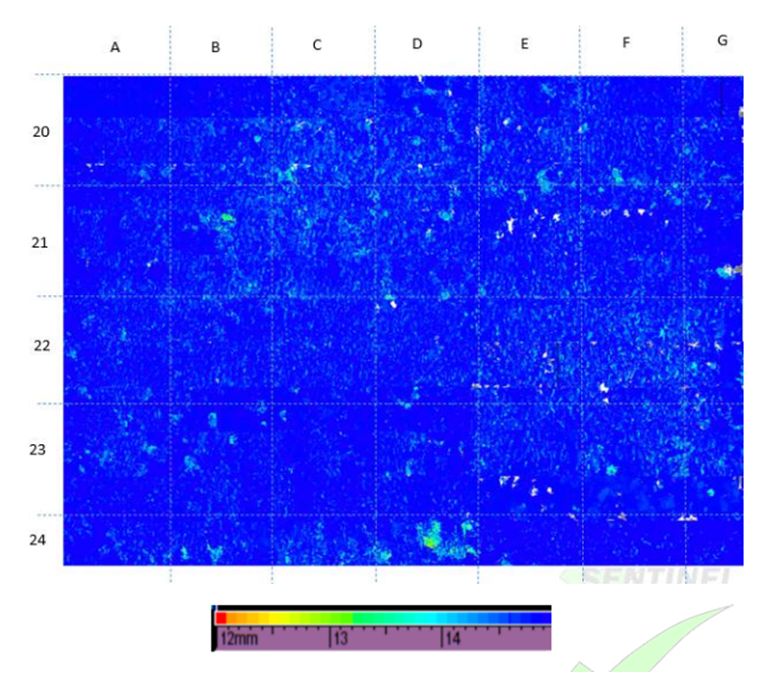
The image above is a typical C-Scan corrosion map (plan view) showing internal corrosion on a pressure vessel, the c-scan is colour amplitude calibrated which means particular colours represent specific remaining wall thickness. In this example the blue areas are nominal (15.0mm) whereas the green is pitting corrosion near the retirement thickness 12.0mm.

HydroFORM buggy

Dual matrix setup on stainless steel weld

The image above is a typical C-Scan corrosion map (plan view) showing internal corrosion on a pressure vessel, the c-scan is colour amplitude calibrated which means particular colours represent specific remaining wall thickness. In this example the blue areas are nominal (15.0mm) whereas the green is pitting corrosion near the retirement thickness 12.0mm.
NDT Technique
NDT Technique
Eddy Current Testing (ECT) / Eddy Current Array (ECA)
Ultrasonic Testing (UT)
Eddy Current Testing uses electro-magnetic induction to detect surface and subsurface flaws in a conductive material.
Eddy Current testing is a method suited for coated specimens where magnetic particle inspection or dye Penetrant inspection cannot be used.
Surfaces need minimal preparation for inspection and can also be used for material sorting, electrical conductivity, and coating thickness measurements.
Eddy Current Array is similar to phased array ultrasonics as a probe is used with multiple elements are utilised simultaneously to scan large areas in a single pass.
Common applications:
Conventional ECT: Painted/coated surfaces and welds – Paint thickness checks
Eddy Array: Aircraft fins / rotor blades etc – Plates on tank floors/walls – Vessel shells
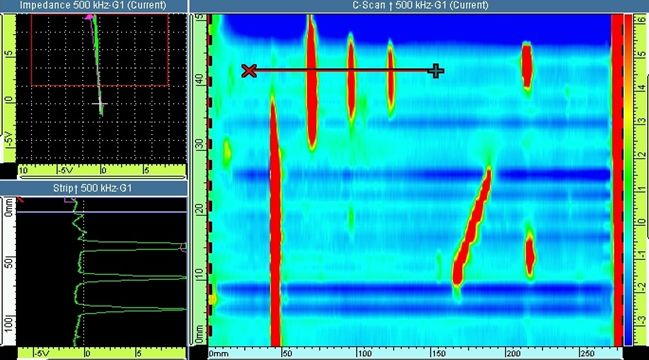
Scan of Calibration block – simulated discontinuities on SA330 Helicopter tail rotors
NDT Technique
Internal Rotary Inspection System (IRIS)
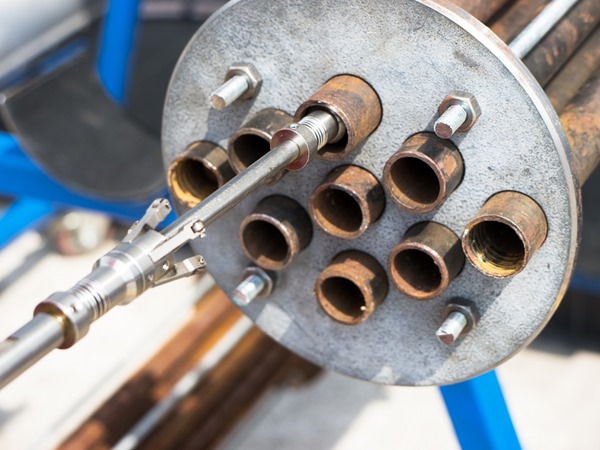
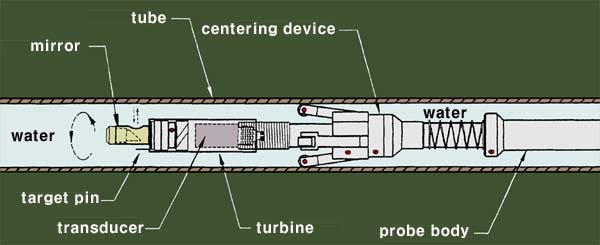
IRIS is an inspection method for the testing of pipes and tubes typically in boilers and exchangers.
The IRIS probe is inserted into a tube and flooded with water, the probe is then pulled back through the tube while the captured data is displayed and recorded.
IRIS can detect wall loss from both the internal and external of a tube/pipe.
Common applications:
- Boiler tubes: Identifying internal and external corrosion, pitting, and wall thinning.
Heat exchangers: Detecting wall loss, scaling, and erosion in tubes.

NDT Technique
Positive Materials Identification (PMI)
Positive material identification (PMI) is the analysis of a material, this can be any material but is generally used for the analysis of metallic alloy to establish composition by reading the quantities by percentage of its constituent elements.
Common applications:
Material verification in fabrication: Ensuring the correct alloy is used before or during production.
Quality assurance: Validating materials meet specifications in critical components such as pipes, valves, and fittings.

NDT Technique
Digital Radiography (DRT)
An imager plate is used instead of conventional film, the data is sent to the viewing software providing an image of the area under inspection.
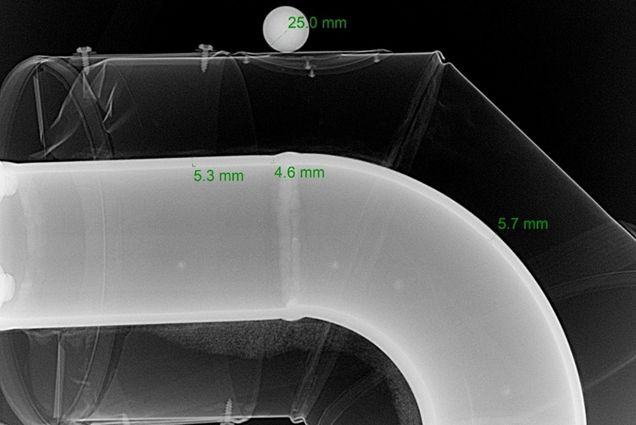
Generally used for internal corrosion monitoring/thickness measurement or checking internal condition of components such as threaded parts and pipeline pigging equipment.
Digital radiography is an effective tool for providing instant results on site when required and radiation exposure time is reduced dramatically.
Common applications:
Thickness measurement: Assessing in-service piping for wall loss or corrosion.
Valve condition checks: Evaluating internal components for wear or damage.
Pipeline inspection: Quickly identifying blockages or locating stuck pigging tools.
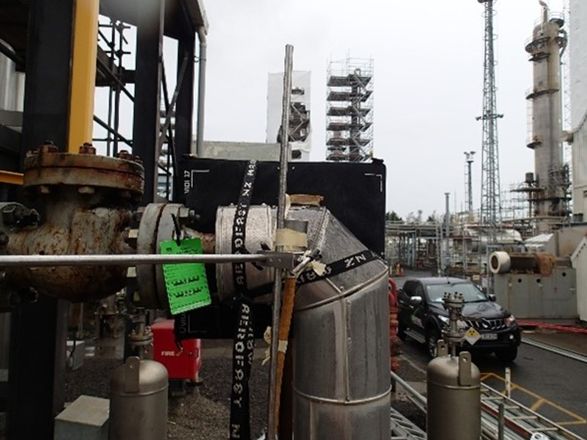
Example of setup for carrying out Digital RT examination
NDT Technique
Phased Array Ultrasonic Testing (PAUT)
Phased Array follows the same concept of conventional ultrasonic testing but can utilise transducers with multiple elements which allows for advanced scanning setups where the ultrasonic beam can be steered at multiple angles simultaneously.
Phased Array Ultrasonics can provide comprehensive results in relation to orientation and depth within a specimen and with the use of encoding apparatus attached to the transducer. Areas of interest can be mapped, and inspections can be repeated on a regular basis for the purposes of monitoring potential discontinuity growth.
This method is primarily used for weld and corrosion inspection, but other applications are possible with the help of specialist equipment.
Common applications:
HydroFORM – A buggy utilising a water column and phased array probe. Works well on rough surfaces which is an advantage over hard wedge scanning methods.
Dual Matrix – For coarse grained austenitic stainless steels and Inconel alloy materials and welds.
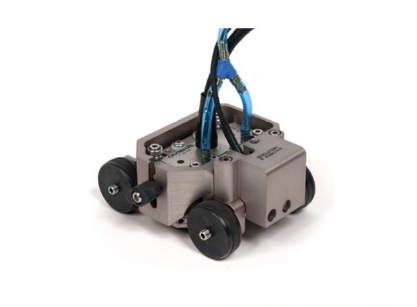
HydroFORM buggy

Dual matrix setup on stainless steel weld
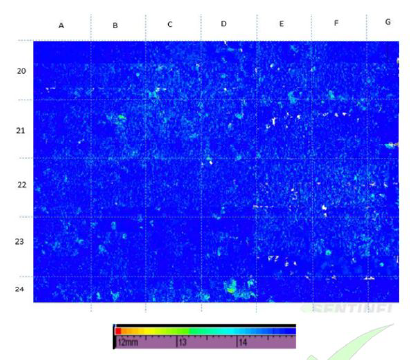
The image above is a typical C-Scan corrosion map (plan view) showing internal corrosion on a pressure vessel, the c-scan is colour amplitude calibrated which means particular colours represent specific remaining wall thickness. In this example the blue areas are nominal (15.0mm) whereas the green is pitting corrosion near the retirement thickness 12.0mm.
NDT Technique
Eddy Current Testing (ECT) / Eddy Current Array (ECA)
Eddy Current Testing uses electro-magnetic induction to detect surface and subsurface flaws in a conductive material.
Eddy Current testing is a method suited for coated specimens where magnetic particle inspection or dye Penetrant inspection cannot be used.
Surfaces need minimal preparation for inspection and can also be used for material sorting, electrical conductivity, and coating thickness measurements.
Eddy Current Array is similar to phased array ultrasonics as a probe is used with multiple elements are utilised simultaneously to scan large areas in a single pass.
Common applications:
Conventional ECT: Painted/coated surfaces and welds – Paint thickness checks
Eddy Array: Aircraft fins / rotor blades etc – Plates on tank floors/walls – Vessel shells


Scan of Calibration block – simulated discontinuities on SA330 Helicopter tail rotors
NDT Technique
Internal Rotary Inspection System (IRIS)
IRIS is an inspection method for the testing of pipes and tubes typically in boilers and exchangers.
The IRIS probe is inserted into a tube and flooded with water, the probe is then pulled back through the tube while the captured data is displayed and recorded.
IRIS can detect wall loss from both the internal and external of a tube/pipe.
Common applications:
Boiler tubes: Identifying internal and external corrosion, pitting, and wall thinning.
- Heat exchangers: Detecting wall loss, scaling, and erosion in tubes.


NDT Technique
Positive material identification (PMI)
Positive material identification (PMI) is the analysis of a material, this can be any material but is generally used for the analysis of metallic alloy to establish composition by reading the quantities by percentage of its constituent elements.
Common applications:
Material verification in fabrication: Ensuring the correct alloy is used before or during production.
Quality assurance: Validating materials meet specifications in critical components such as pipes, valves, and fittings.

NDT Technique
Digital Radiography (DRT)
An imager plate is used instead of conventional film, the data is sent to the viewing software providing an image of the area under inspection.
Generally used for internal corrosion monitoring/thickness measurement or checking internal condition of components such as threaded parts and pipeline pigging equipment.
Digital radiography is an effective tool for providing instant results on site when required and radiation exposure time is reduced dramatically.
Common applications:
Thickness measurement: Assessing in-service piping for wall loss or corrosion.
Valve condition checks: Evaluating internal components for wear or damage.
Pipeline inspection: Quickly identifying blockages or locating stuck pigging tools.
Example of setup for carrying out Digital RT examination

